For beginners who want to learn how to whittle, it's possible to start with the basics. Make sure to have some tools and a knife. In this article, you'll learn about tools, techniques, and wood types. Once you've got the basics down, you can start your own whittling project! There are many types and styles of whittler projects.
Wood
There are thousands upon thousands of wood types. But these woods are best for whittling. This list of woods can help you start whittling. There are many methods to whittle wooden pieces to make different shapes. Here are some simple methods for whittling wooden objects.
The pull stroke: You need to align the blade with the grain of the wood when carving wood. This will help avoid damaging the wood. Look for dark streaks through the wood to determine the direction of grain. When whittling hardwood, the direction of these streaks will dictate the direction the blade should be pointing. The push stroke will cut through wood more effectively than the pull stroke.
Knife
Woodworking is something you can try if you are new. A good place to start is to whittle with a knife. Although you may not be an expert at this task, you will have greater control over your knife and can make more precise cuts. By cutting small strips of soap using a knife, you can practice pulling strokes. Practice makes perfect. Beginner projects are easier to handle and get more challenging as you progress.
Before starting whittling, you'll need a knife. The best knife for whittling is a pocket knife. It is sharp enough to create shavings with a sharp edge. Avoid knives with long, wide blades as they can cause choking. You should choose a narrower blade to make it easier and faster to sharpen. If necessary, you can also use a framesaw.
Techniques
There are several techniques that can be used to improve your whittling abilities. Pull stroke is the most popular cut. This involves placing your right thumb on the piece of wood and pinching your left fingers. You then draw the blade towards your right thumb and keep the knife straight. This stroke is quick and precise and gives you great control over the knife. This is best for intricate cuts.
There are two primary types of whittling books. The Old Time Whittling is the first, and it is a great reference book for beginners. The Little Book of Whittling contains many useful whitling suggestions. Many whittling ideas can be found in The Whittling Handbook. The Art of Whittling contains some more advanced projects. This book contains patterns such as ball and cage, as well as simple puzzles.
Tools
Good wood is essential for making whittling tool. While it is possible to use existing wood, it is much better to gather greenwood. It is much easier to carve greenwood than dry wood. Deadfall branches can be collected at any time. Small trees can also be collected at any season, but the best time to collect them is in the winter. Ask permission before you start collecting wood if your work is on private property.
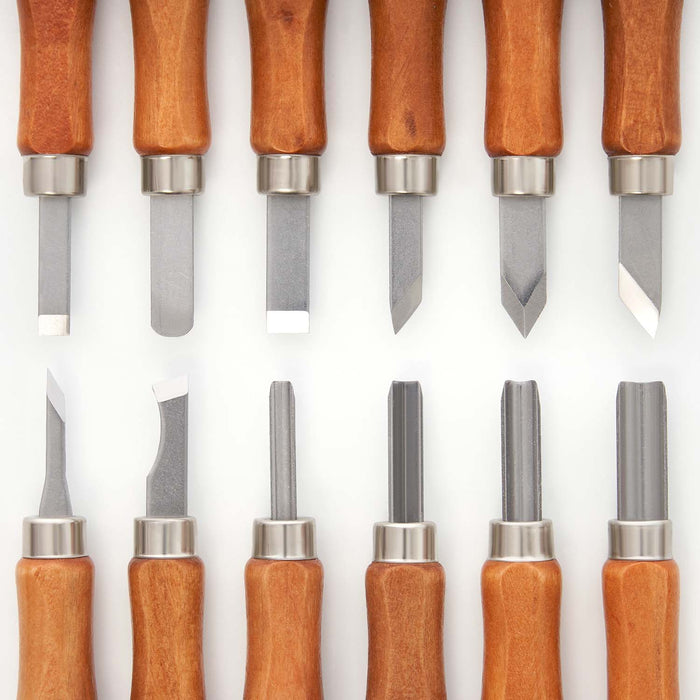
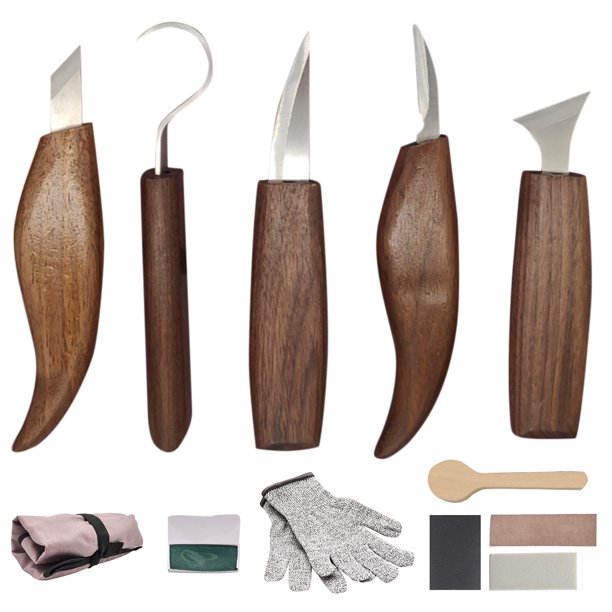
Sets are great for those just beginning to carve. The Delicacy Carving Set includes 12 tools as well as a blank for a wooden spoon and a knife-sharpener. The set includes protective gloves and a bag. Because you'll be using these tools for a long time, it is worthwhile to invest in a set. This set is an inexpensive way to get started.
Starter projects
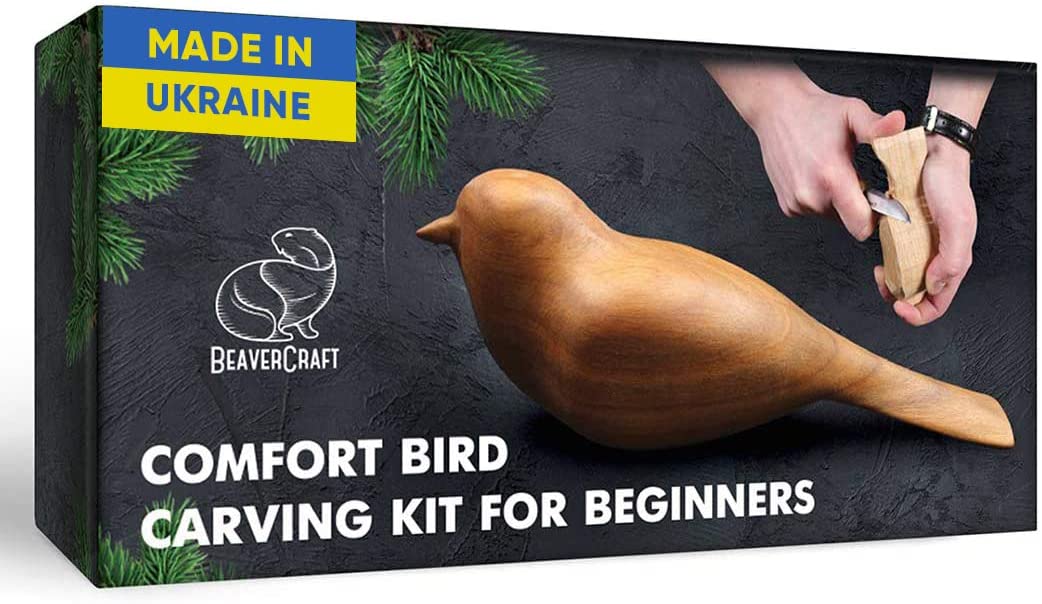
You might start out with a simple project like a walking stick if you're new to wood whitling. You can progress to more complicated projects like carving faces on walking stick. Comfort Birdie is a bird that can provide comfort for beginning whittlers. A swan is an excellent beginner project in whittling. These are wonderful gifts for children and are very easy to make.
A carved ball in an enclosed cage is another project that can be considered beginner-friendly. You can create complex designs and match feathers with your theme. Tiki idols can also be created. The possibilities are endless, but it's always a good idea to have a template before you begin. This will let you know which tools to use and which parts are not.
FAQ
How can a beginner woodworker make money?
Many people are starting to learn how to build furniture because they want to start an online business. You don't have to sell on Etsy if your furniture is just beginning. You could sell at craft fairs or local events. For those who want to build their own furniture, you might offer workshops. Consider offering your services if you have previous experience as a builder or carpenter.
Do you have any suggestions for starting a woodworking shop?
It can be difficult to start a woodworking shop. However, if you are passionate about your hobby you will be willing to put in the effort. You will probably love the challenge of starting your own business.
Remember that you may encounter unexpected problems when starting a new venture. For instance, you might run out of money unexpectedly. Perhaps customers won't pay you as much as you had hoped. You need to be ready for these situations if you want to survive.
Set up a separate account in your bank for your business. This will ensure that you always know how much money has come in.
Where can I get free woodworking plans?
For free woodworking blueprints, you don’t need to read any magazines or buy any books. You just need to search Google. You can search Google for "free woodworking" and hundreds of websites will appear allowing you to download plans.
Which wooden products are most popular?
Most wooden items that are best-sellers are made from wood harvested sustainably.
Maple, cherry, mahogany walnut, teak, mahogany and maple are the most common woods for furniture.
These woods not only have great strength, but also beautiful patterns and colors. They also last for many years if cared for properly.
Wooden furniture should always be painted first to protect against moisture damage. This applies to all surfaces, even drawers and doors.
A paint that resists water is the best choice to ensure that furniture lasts a long time.
A high-quality oil-based primer should be used, followed by two coats with top coat. Depending on the amount of wear, you may need several coats.
Avoid spray cans and aerosol paints. These products contain solvents which evaporate quickly and leave behind harmful fumes.
Statistics
- Most woodworkers agree that lumber moisture needs to be under 10% for building furniture. (woodandshop.com)
- The U.S. Bureau of Labor Statistics (BLS) estimates that the number of jobs for woodworkers will decline by 4% between 2019 and 2029. (indeed.com)
- The best-paid 10 percent make $76,000, while the lowest-paid 10 percent make $34,000. (zippia.com)
- If your lumber isn't as dry as you would like when you purchase it (over 22% in Glen Huey's opinion…probably over 10-15% in my opinion), then it's a good idea to let it acclimate to your workshop for a couple of weeks. (woodandshop.com)
External Links
How To
How to drive a nail through wood
First, choose the right size and type of tool to drive a nail through wood. The most commonly used types of Hammers are claw hammers. Each type of hammer comes with its advantages and disadvantages. A clawhammer works best when hitting something hard like nails. However, it can sometimes be difficult to see exactly where the strike is going. Although a sledgehammer can be used to hit large areas quickly, it is too heavy to be useful for small tasks.
After selecting the right hammer, you will need to place your hand flat against one side of the head. The handle should rest comfortably in your hands. Hold the handle in your hand, but don’t force it too hard that you break. Your wrist should be relaxed while you hold the hammer straight upwards. Next, swing the hammer toward the ground and aim for the nail's center. You should feel the impact on the nail from the hammer. Try practicing with a block to help you master the art of swinging a stick.
You can now drive the nail by holding the hammer to your body. Place the nail so that it is perpendicular with the wood's surface. Keep your eyes on the tip. Then, swing the hammer forward. Next, follow the motion of your hammerhead. Keep doing this until you are comfortable with the swing. Try adding power to your swings when you've mastered the technique. Try holding the hammer above your shoulder and bring it down forcefully. This will help you put more energy behind each of your moves.
After you have nailed the hole, take the hammer off the nail. To pull out the remaining nails, use a screwdriver or pry bar. Keep the nails heads in line with the surface of the board to prevent splitting the wood.