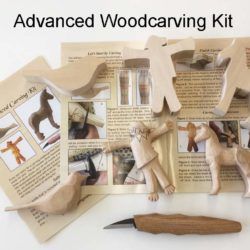
Choose a piece wood and begin carving the face. As the expert guides, you can watch a video that shows the entire process step-by-step. The progressing cut will make carving the face much more realistic. It is important to create a lifelike facial expression by adjusting the position of the noses in the wood. You can add realistic details to your face by using colored dyes or shellac.
Hardwoods
When carving a face in wood, you must first consider the type of wood to be used. Hardwoods, a type of tree with broad leaves, can grow in different climate zones. Hardwoods are ideal for many purposes, such as furniture building and furniture making, due to their large range in density, strength, and appearance. While hardwoods may be more affordable than softwoods due to their durability and fire resistance, they are still very durable.
Softwoods such as butternut or basswood are good options for beginners to wood carving. These types of wood are easier to work with and are a good choice for beginners. It is important to remember that hardwoods can have the same quality and finish while softer woods are not. Try different types of wood before you settle for one.
Softwoods
When carving a face from wood, the first step is to choose the right softwood. Softwoods are harder to carve and can often be knotted. They are also more susceptible to breaking, particularly if you use large strokes. An experienced carver may cut small pieces of wooden, which can reduce the detail. This is not a big problem, but it is something to be aware.
Some hardwoods are more difficult to work with than others. Aspen, butternut and basswood are some of the most easy to work with. You should use knives that have a greater bevel. Softwoods also make it easier to work with than hardwoods. This allows you to carve along or against the grain. The wood that you use for carving will determine the quality of the finished product.
Colored dyes
For wood carvings that are vibrant and detailed, you can use colored dyes. These dyes are available in a variety colors that can be mixed with water or alcohol to create unique colours. For lighter woods, you can use colored dyes mixed with shellac. After applying dyes, ventilate your work area and clean your brushes with denatured alcohol. Paste wax is another option. Be aware that an excessive glossiness may distract from your work. Use 0000 steel wool to remove excess glossiness.
There are many wood dyes available and they can be applied easily. Wood dyes are compatible all topcoats, and they are easy to use. They solve common finishing challenges. Because they come in a wide array of primary colors, they're easy to mix and apply. They are also available in many shades that can be mixed to suit individual preferences. You can mix them to make unique colors.
Shellac
It is important to have the shellac ready before applying it on your wood carving. A jar of shellac is available, but the best way to apply it to your wood carving is with a brush. Generally, a two-pound cut will do. Because it builds up slowly and reduces brush marks, a two-pound cut will do. It is better to get a thicker cut of shellac than one that is thinner, as it is extremely water-thin. To ensure that you get enough, make your own pad using golf ball-sized chunks of cotton. Then, dip the tip of your brush into the shellac and let the excess flow back into the bottle.
Shellac can add color and highlight grain. Shellac is available as a variety colors. This allows you to mix and match different shades of resin to create your own blends. The lac can be used to darken the color. Shellac doesn't get cloudy or yellow like other wood finishes. It will also last longer, so you can make more faces. And you can do this with any kind of wood carving project!
Gouges
There are many types of gouges. The straight and the palm gouges types are the most commonly used. Straight gouges can only be held with one hand. Palm gouges, on the other hand, have shorter shafts. Handheld carving becomes easier thanks to the shorter handles. Palm gouges also known as veiners are excellent for carving faces in wooden wood. Here are some tips before you start carving.
First, it is important to understand how to select the correct gouge. You should be able cut a narrow v-shaped groove with the gouge that you select. It is important to have a sharp edge, small sweep and a very small tool. A gouge is often classified according to its size. A 3/10 gouge will create the same-sized cut as an 5/10 gouge. As the number increases, the scoop between each edge becomes deeper and the sweep becomes more curved. A gouge with a small sweep will be able to carve a shallow v-shaped profile.
FAQ
How often should I buy new supplies?
You may have to replace certain tools. Hand tools will need to be sharpened regularly. For power tools, replacement parts will be required frequently. Try spreading your purchases over a few months so you don't buy too many at once.
Do you know anything more about woodworking?
It is easy for people to overlook the work involved in furniture making. Finding the right wood is the hardest part. There are so many varieties of wood available that choosing one can be difficult.
Another issue is that wood does not have the same properties. Woods can warp, split, or crack over time. These things should be considered before you buy wood.
Can this be a way to make money?
Yes! In fact, most woodworkers already have it. According to the U.S. Bureau of Labor Statistics, the median annual woodworker wage was $34,000 in May 2012. This is much higher than the national median of $31,000 per annum.
How can I keep my shop organised?
A designated place to store your tools is the first step towards keeping your workshop clean. You want your tools to stay clean and free from debris and dust. You can hang tools and accessories with pegboard hooks.
Statistics
- The U.S. Bureau of Labor Statistics (BLS) estimates that the number of jobs for woodworkers will decline by 4% between 2019 and 2029. (indeed.com)
- Overall employment of woodworkers is projected to grow 8 percent from 2020 to 2030, about as fast as the average for all occupations. (bls.gov)
- Average lumber prices rose about 600 percent between April 2020 and May 2021. (familyhandyman.com)
- If your lumber isn't as dry as you would like when you purchase it (over 22% in Glen Huey's opinion…probably over 10-15% in my opinion), then it's a good idea to let it acclimate to your workshop for a couple of weeks. (woodandshop.com)
External Links
How To
How to make wood joint
This tutorial will demonstrate how to join two pieces together of wood. We will use the pocket hole joint, which is drilling holes in the wood to join them. If your wood has a straight grain, smooth surface, you can use this method. If your wood isn't straight or flat, you might want to try another method, such as dowel joinery. Here are the steps
-
Drill Pocket Hole Joints. Measure and mark the location where you would like to place the pocket hole joint. You will then drill 3/4" deep holes through each piece of wood with a jigsaw, handheld drilling machine, or hand-held drill.
-
Sand Smooth. Sanding the edges of the wood will help to prevent the joint from splitting later.
-
Glue together. Apply glue to both sides of the wood. Let the wood sit for 5 minutes, then clamp it together.
-
Connect the pieces. After the glue has dried completely, you can clamp the pieces together until they are flush.
-
Trim Joinery. After the glue dries, trim any excess wood around your joint.
To be able to turn the pieces inside-out, leave enough room between them.