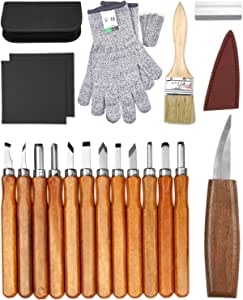
There's no better way than following a photo trail if your heart desires to carve. It can be a great way to emulate a famous carving without spending hours researching different styles. You want your eyes to look as real as possible and it will be a lot of fun. Don't worry if you haven't been a skilled carver before. There are many easy methods to achieve realistic-looking vision.
Lesson 4: Carving hair
This step-by-step tutorial will show how to carve flowing hair onto the eyes for your animal carving. It will allow you to create a lifelike appearance and create an illusion of emotion. It will show you the various tools you can use in order to create different textures. You will also be able to learn how to make different levels of haircuts using curved tools. Once you are familiar with the basics, the next step is to learn how to work on the more complex areas of the face such as the eyeballs.
With a pencil, draw the eye cavities. Next, draw an extended straight line from your eyebrows and eyelids. You can also draw small squiggles on the forehead to make it rounder. After that, you can use a whittling blade to round out the corners and the bottom lip.
Lesson 5 - Carving crow's feet
Crow's foot is something that you should be aware of. These wrinkles can be caused by repeated facial expressions such squinting. If you have crow's foot, you can use reading glasses, or get sunglasses. Facial moisturizers can be used to prevent crows feet.
Face wrinkles and fine lines can make people look older than they actually are. You can easily get rid of these lines and reveal a younger complexion. Here are some helpful tips.
Lesson 6: Carving an iris
Children can see the iris, ocellus and other parts of their bodies in a mirror. This will help them to understand how they feel and look. They can also draw their own eyes using observational drawing and the mirror. They can look for white or different shades of one colour in the iris and the black in the centre. After they've finished drawing, they can add color using different media to create depth illusions. Children can compare their eye drawings and see how they differ in color.
FAQ
Are you looking for tips to start a woodworking company?
Starting a woodworking business is a lot of work. However, if you are passionate about your hobby you will be willing to put in the effort. You'll likely enjoy the challenge of owning your business.
You should remember that unexpected issues may occur when you launch a new venture. For instance, you might run out of money unexpectedly. Or maybe you'll find that customers aren't willing to pay as much as you'd hoped. To survive, you'll need to be prepared for such situations.
One tip is to have a separate banking account for your company. This will ensure that you always know how much money has come in.
How much should a skilled woodworker earn per hour?
Hourly rates for professional woodworkers vary depending on many factors such as skill, experience, availability, geographical location, and other variables.
The hourly average rate for skilled woodworkers runs between $20-$50.
A woodworker with less experience may be able to charge $10 an hour.
What is the difference in plywood and particleboard?
Plywood can be described as a mixture of layers and wood that have been pressed together with pressure. Plywood can come in many thicknesses and is used for flooring and cabinets. Particle board is made from sawdust mixed with resin and then compressed into large blocks. It's commonly used for home improvement projects. Both types are sturdy and easy to cut.
Statistics
- Overall employment of woodworkers is projected to grow 8 percent from 2020 to 2030, about as fast as the average for all occupations. (bls.gov)
- The best-paid 10 percent make $76,000, while the lowest-paid 10 percent make $34,000. (zippia.com)
- Woodworkers on the lower end of that spectrum, the bottom 10% to be exact, make roughly $24,000 a year, while the top 10% makes $108,000. (zippia.com)
- Most woodworkers agree that lumber moisture needs to be under 10% for building furniture. (woodandshop.com)
External Links
How To
How to drive a nails in wood
To drive a nail into wood, the first step is to select the right size and type hammer. There are many types of hammers that you will find: claw hammers and sledgehammers; mallets; ball peen hammers; and hatchets. Each type of tool has its advantages and drawbacks. A claw hammer is best for hitting nails or hard objects. However, it can be difficult to pinpoint exactly where the blow will land. A sledgehammer is great for hitting large areas at once, but it's too heavy to use effectively for smaller tasks.
After selecting the right hammer, you will need to place your hand flat against one side of the head. The handle should rest comfortably in your hands. Take the handle and hold it with both hands. But don't press down so hard you injure yourself. The hammer should be held straight up with your wrist relaxed. Then swing the hammer back toward the ground, aiming for the center of the nail. The impact of the hammer hitting the nail should be felt. If you're having trouble getting the hang of swinging a hammer, practice with a block of wood until you get the rhythm down.
Hold the hammer near your body until you're ready for the nail to be driven. To ensure that the nail is perpendicular on the surface of the wooden floor, position it. Keep your attention on the tip. Move the hammer forward and then continue to move the hammerhead. Repeat this action several times, gradually increasing the speed of the swing. When you are confident with the technique, add power to your swings. Hold the hammer high above your shoulders and pull it down. This will allow you to exert more energy.
Once you have successfully drilled the first hole in the nail, remove the hammer. The rest of the nails can be pulled out using a screwdriver, pry bar, or a hammer. To avoid splitting the wood, make sure the nail heads are not touching the board's surface.