
The first step in chip carving is to visualize where you want the blade point to be. Next, begin to cut the tile from the point. Then work your way up to larger chips. Try not to pry out the chips but gently wiggle them out. Cut a bit deeper if the tile has any bits left. Continue this process until you are satisfied with the finished tile. You can then create your own unique chip carvings using a pattern.
Freeform style carving
For free-form chip carving, you can use both a split and straight-edged cutter to carve a pattern on the wood. Because the fibers of the split blank are straight, you can use more power to carve. You can then cut in both directions by cutting flat the top layer of the wood and removing the bottom layer. You can improve your carving skills by using different templates.
It can be difficult to carve, but once you learn the basics, the rewards will be well worth it. It can take as much time as actual carving to create a design. Chip carving requires many cuts and ridges. Therefore, it is essential to have the chip carves sharp at the base of the ridges. It does not matter if you carve circles or ridges.
Using angled cuts
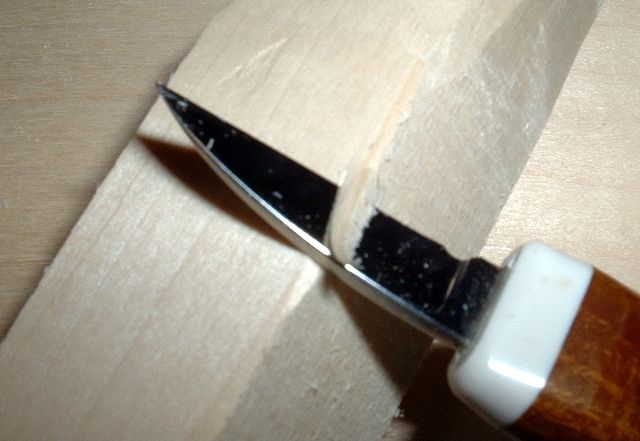
It is important to imagine how your chip will look if you use an angled blade to cut it. Most likely, the chip will have two sides. One side will be straight. The knife's point should be at the intersection of these two walls. Then, you will want to make a third side cut, which should meet the two previous side cuts at the deepest point.
Chip carving works better when the wood's color is light. This creates a stronger contrast between the negative and positive spaces. Light-colored wood will also allow for a greater contrast in the shadows. A chip cut that is straight will emphasize the negative space above it, while an angled cut will create a gentle shadow that will be more pleasing to the eye. It will appear that the letters have been cut from the wood if your chip is angled.
Using a Flexcut knife
If you want to begin chip carving with an excellent, professional quality blade, you should consider investing in a Flexcut knife. These American-made knives boast a sharp edge and are pre-sharpened. However, they need to be regularly stropped in Flexcut Gold polishing material. This knife's ideal bevel angle is 15 degrees. For chip carving, you should hold the knife at this angle.
If you're new to chip carving, you might be surprised by the versatility and accuracy of these knives. Every Flexcut knife has a reliable, long-lasting edge. The handles are made of ergonomically-shaped wood. These knives are designed to provide precise control of each cut while reducing the risk of chipping. Flexcut offers a special coating which prevents chipping to protect your carving tools.
Making a pattern
First, draw a design to create a chip-carving pattern. This pattern can be free-form or have basic geometric shapes like circles, squares, and ovals. It is important that the lines are straight. It might take a few attempts before you get the hang of it. You can practice the pattern by making a practice board from scrap wood. You can begin carving once you have a template.
Drawing a grid can help you create a square. This pattern allows you to create unique pieces by experimenting with different designs. You will need a ruler and a pencil to draw the patterns. Each cell of the grid must be square. The sides of each cell should measure 3/16" to 1/8". To make triangles you can connect each corner of a cell to another to create triangles.
Getting started

Learn the basics of chip carving before you start. The majority of designs are geometric so graphite papers can be used to trace a pattern onto your wood. To ensure accuracy, you can use a ruler as you trace along each edge of the wood. To erase the lines you have drawn, you can use a pencil or an eraser. Once you have mastered this technique, you can practice on a larger surface until you have a good grip.
One of the greatest things about chip carving is its simplicity and low cost. Chip carving is simpler than wood carving. Chip carving is an easy way for beginners to create beautiful pieces. Personalize pieces to be given as gifts or used in your home. It is a rewarding hobby that can be passed down from generation to generation. Start by learning how to chip carve on a small piece or spoon of wood.
FAQ
Is there anything else I should know about woodworking?
It's easy to underestimate the amount of work involved in making furniture. Finding the right type of wood is the most difficult aspect of this process. There are so many options for wood, it can be difficult choosing the right one.
Another problem is the fact that not all wood has the same properties. Some woods will crack or warp with time. Others will split or crack. These factors should be taken into account before buying wood.
What is the average time it takes to finish furniture?
It depends on the type of wood you choose, the complexity of the design, and the amount of finishing you apply. Hardwoods are more difficult to maintain than softwoods. Hardwoods can also be more costly than softwoods. They are more durable and can withstand moisture better. Finishing furniture can take anywhere from one week up to three months.
Can you teach yourself woodworking?
It is best to do it yourself. Woodworking is an art that takes patience, practice, skill and experience. It takes time to master any craft.
The best way to learn how to do something is actually to do it. Start small and then build upon what you've learned.
Statistics
- Average lumber prices rose about 600 percent between April 2020 and May 2021. (familyhandyman.com)
- Overall employment of woodworkers is projected to grow 8 percent from 2020 to 2030, about as fast as the average for all occupations. (bls.gov)
- The best-paid 10 percent make $76,000, while the lowest-paid 10 percent make $34,000. (zippia.com)
- Woodworkers on the lower end of that spectrum, the bottom 10% to be exact, make roughly $24,000 a year, while the top 10% makes $108,000. (zippia.com)
External Links
How To
How to join wooden boards without using nails
Woodworking is a popular hobby. Woodworking is a relaxing hobby that allows you to use your hands to create useful things from wood. Sometimes you may want to join two pieces together of wood without using nails. This article will help you to maintain the beauty of your woodwork projects.
First, remove any sharp edges from the wood pieces before you join them. You don't want any sharp corners to cause problems later. Now it's time to start glueing your boards together.
If you are working on hardwood, you should only use glue on one side. If you are using softwoods such pine or cedar, glue should only be applied to one side. Apply the glue to the boards and press them down until they are securely attached. Make sure you let the glue dry before moving on to the next step.
After you glue your boards together, drill holes at the joints where screws will be inserted. You can choose the type of screw to determine the size of your holes. For example, if your screw is a 1/2-inch wooden screw, drill a hole that is at minimum 3/4 inches deep.
After drilling your holes, drive the screws into the board's backside. You should be careful not to touch the board's front surface. This could cause damage. When driving the screws, try to avoid hitting the ends of the screws too much. This will help prevent splitting of the end grain.
After your project is completed, you will need to protect it from the weather. You can either cover the entire furniture or just the top. Either way, you'll want to use a product that will last for years to come. Some examples include oil-based varnishes, polyurethane, shellac, lacquer, etc.
You can find these products at most home improvement stores. Make sure you get the right product for your job. Don't forget to keep in mind that some finishes are toxic. Wear protective gear whenever you are handling them.